

We are excited to announce that you can now join our network of nodes powering our Web 3.0 App -https://hub.zchg.org and our explorer - https://explorer.zchg.org You can see the network’s nodes over at https://stats.zchg.org. If you are trying to find our Github, it is located here.
So, to create your own node…
-
Write to [email protected] so that your node will be authorized by the network. You may also post here in these forums. Or, you can reach us more quickly on our telegram - Telegram: View @chargchat. Point is, reach out to us so that we may authorize you.
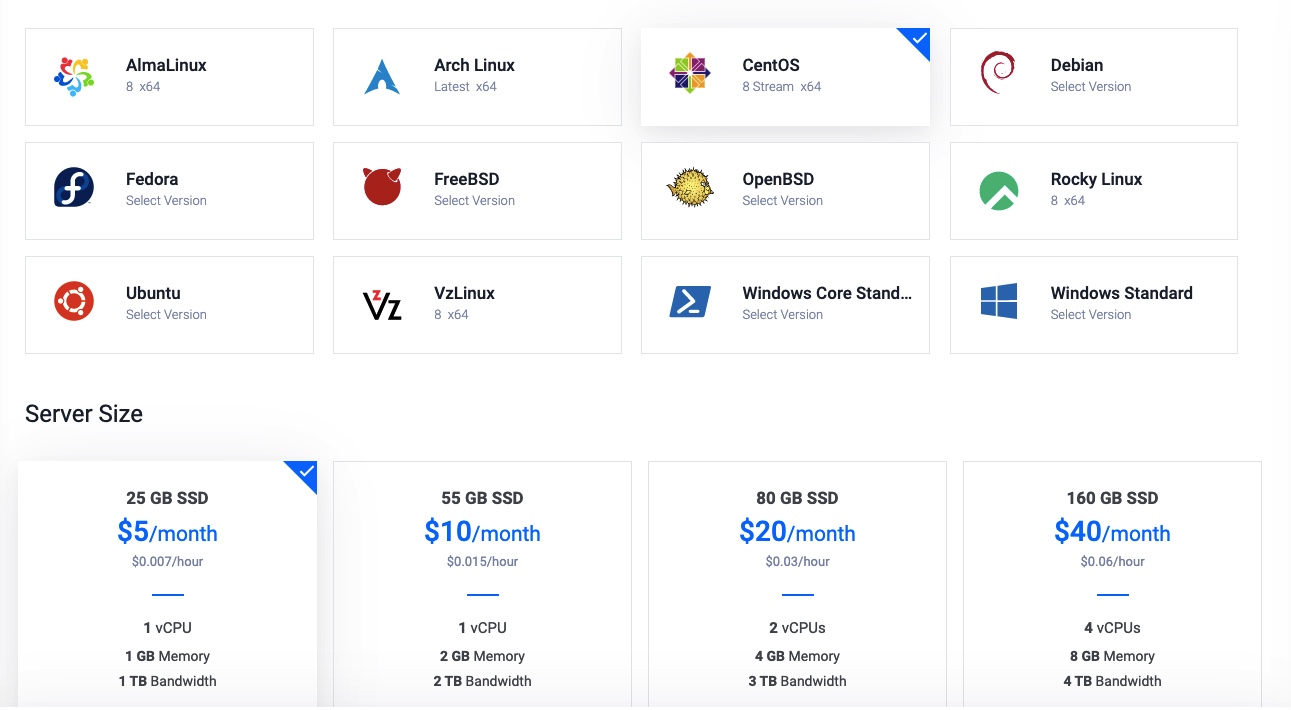
CentOS (Recommended):
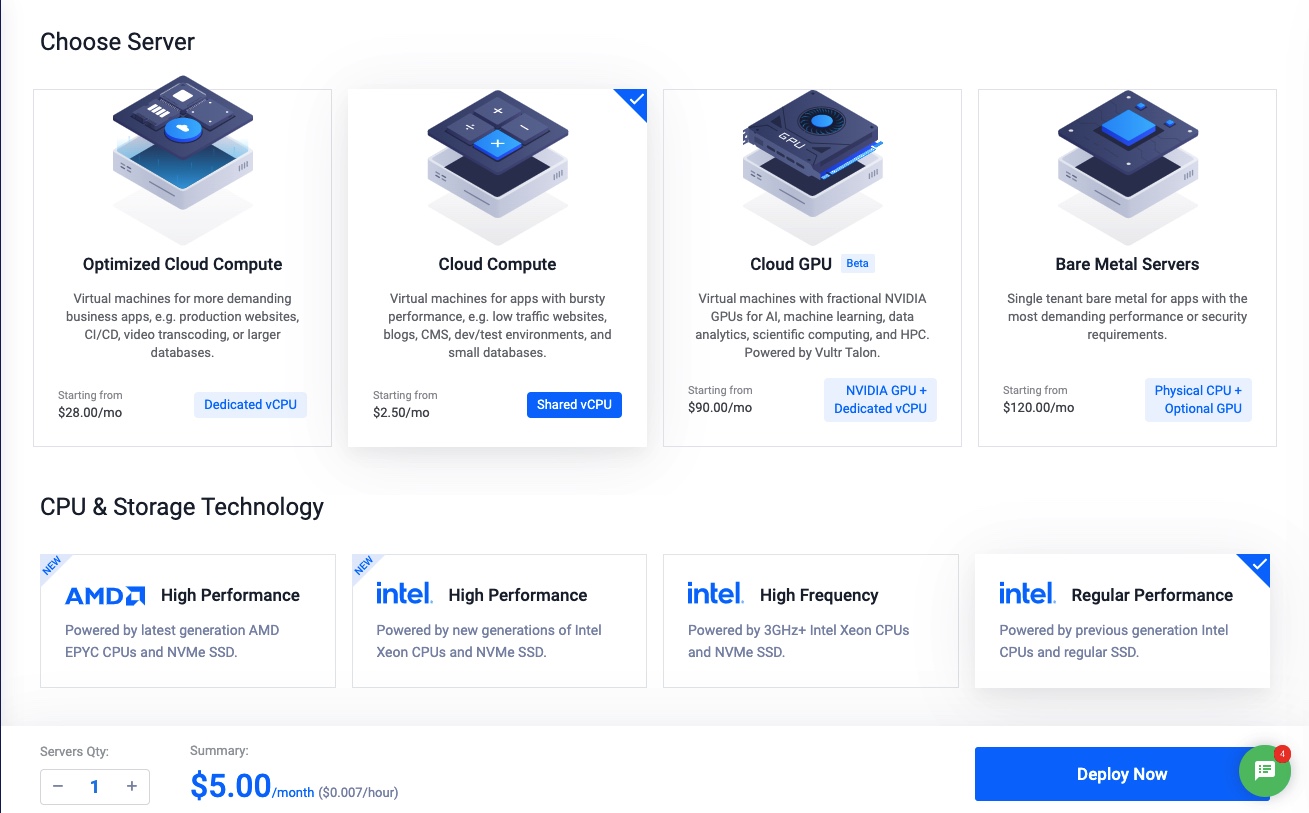
- I have chosen https://vultr.com to spin up their cheapest server, it’s $5 for 1GB RAM, 25GB SSD, 1TB/month as of this writing. But any hosting provider should work. Since everything was developed using CentOS 8, we recommend selecting this operating system.
-
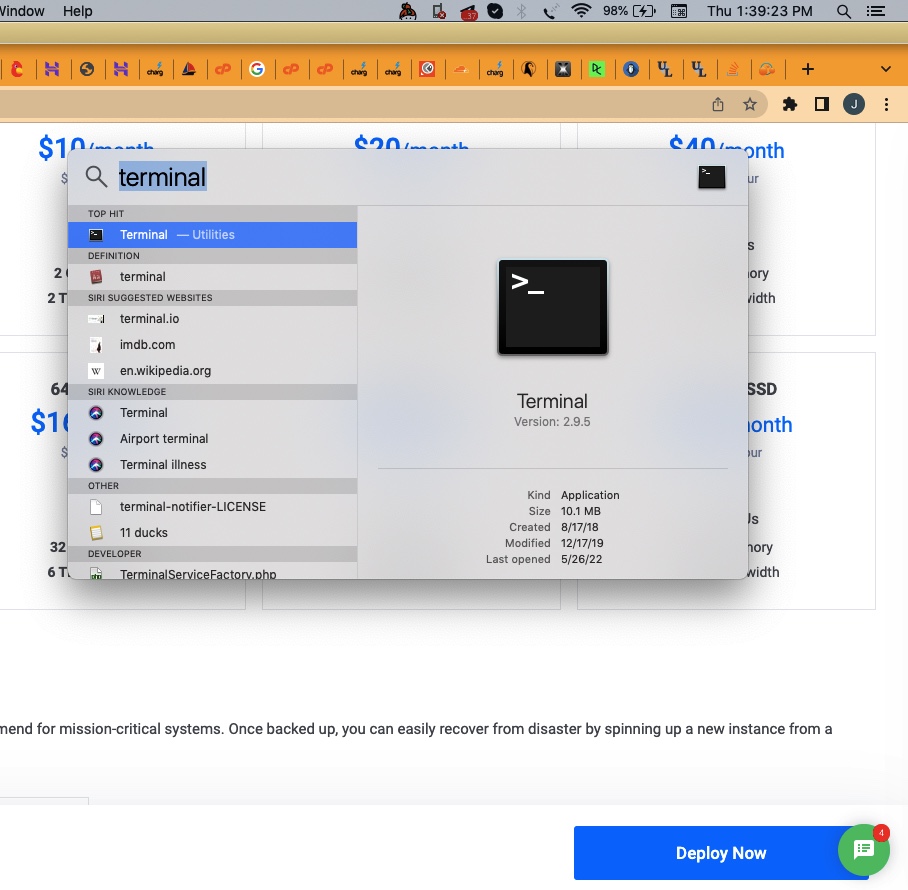
Open terminal in MacOS, or CMD in Windows. Since CMD is very limited, I like to download Putty for Windows. On a mac all you have to do is click on the magnifying glass icon on the top right, then type “terminal” into search. Then hit Enter to open terminal.
$ SSH root@YOURHOSTIPADDRESS
(remember to replace YOURHOSTIPADDRESS with the dedicated IP address included with your host)
$ wget https://files.zchg.org/files/chargnet-setup -qO- | sh
MacOS:
- Open terminal. In Windows, I like to download Putty but on a Mac all you have to do is click on the magnifying glass icon on the top right and type “terminal” into search. Then hit Enter to open terminal.
3) Within terminal:
Install Homebrew
$ git -C "$(brew --repo homebrew/core)" fetch --unshallow
Install wget
$ brew install wget
Install Charg Node
$ wget https://files.zchg.org/files/chargnet-setup -qO- | sh
It’s installed, now what?
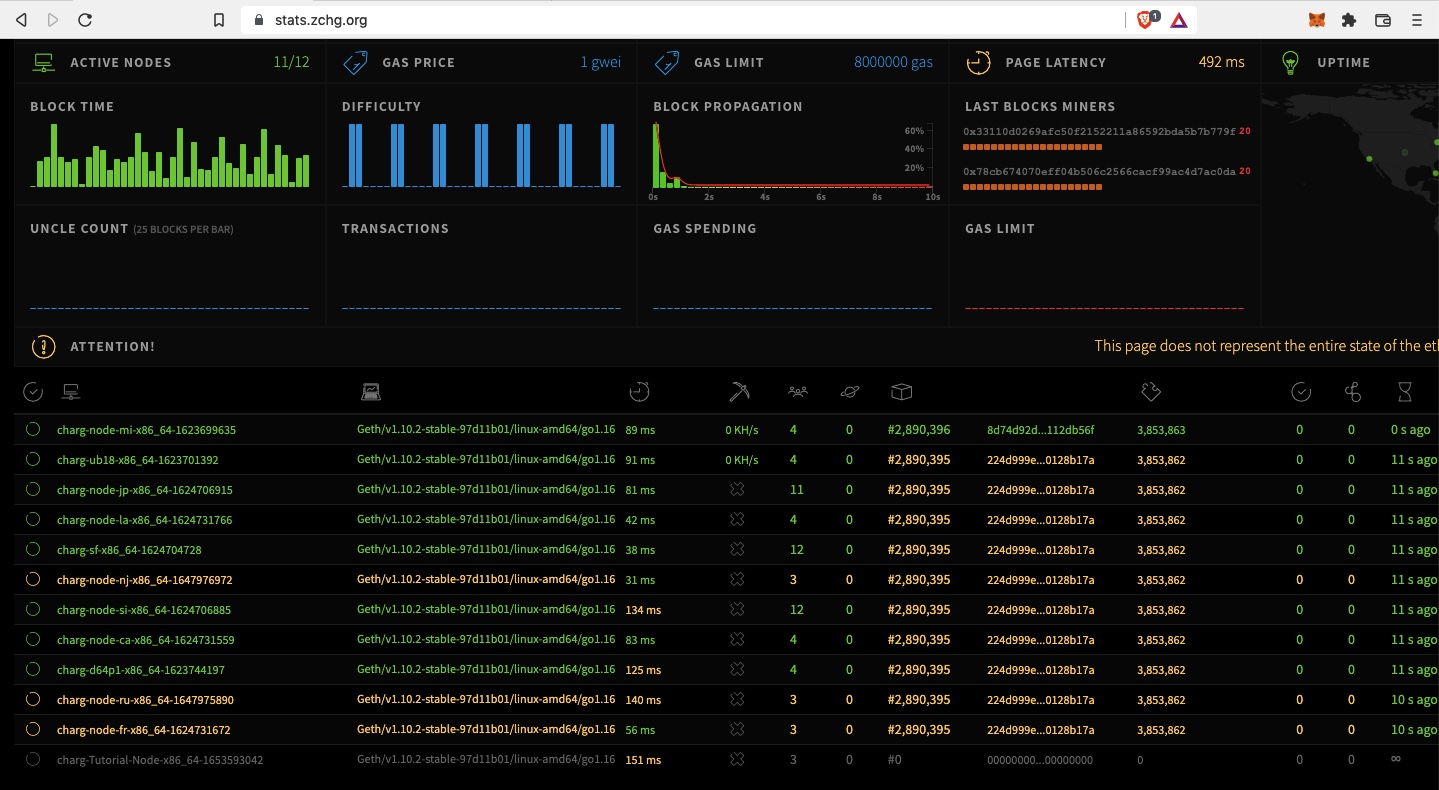
You should now be able to see your node on our network stats page: https://stats.zchg.org. It may take several days or even a week or two for your node to synchronize with the network, but if you see it on the website in grey it’s working. That’s my node in the screenshot, ‘charg-Tutorial-Node’ - you see me there at the bottom?
You may also choose to run the following commands from within Terminal to see that status of your node:
Check Node Status
$ systemctl status charg-rpc
Full Logbook
$ journalctl -u charg-rpc
You might have come here looking for the Electric Vehicle Charger and Wifi Leasing Node for Raspberry Pi. This is different from the blockchain node, and in fact we do not at this time recommend running an EV charging station using the blockchain node unless you’ve got extra system resources to spare for a more powerful node. Any case, if you were looking for that guide, it is located here.
You might also be looking for our Media Kit, located here.
